Using your Structure Sensor for the first time
The Structure App
The Structure app is the first app for the Structure Sensor available on the App Store. The Structure app includes a number of visualizations to show the raw data being captured and streamed by your Structure Sensor to your iPad.
The first is the infrared feed being captured by the Structure Sensor's infrared camera. To view this feed, connect your Structure Sensor to your iPad via the included Lightning cable, and then open the Structure app. Then, tap "IR" on the right hand menu.
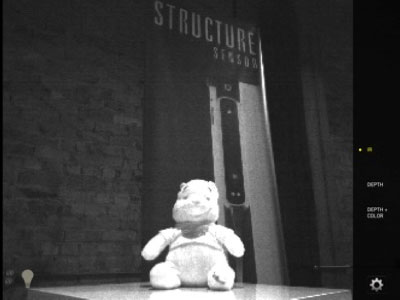
A view through the Structure Sensor's infrared camera.
In this mode, you can even use your Structure Sensor for night vision!
In the lower left hand corner, you'll see a light bulb icon. Tap that icon to turn on the infrared LEDs to flood the scene with additional infrared light.
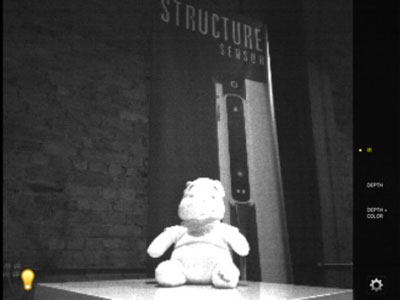
The light bulb icon in the lower left hand corner illuminates the Structure Sensor's two infrared LEDs for additional infrared lighting.
The next visualization you can explore is the raw depth stream being captured by your Structure Sensor. Tap the "Depth" link in the right hand menu to view the depth stream.
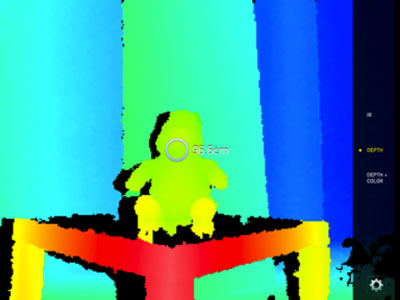
A view of the raw depth feed from the Structure Sensor.
The circular target shows the distance between the Structure Sensor and objects closer than 4 meters.
You'll notice that there is a circular target with a measurement next to it. This is the exact distance from the Structure Sensor to the object that the target is covering. You can move your iPad to move the target, or you can tap the screen to move the target without moving the iPad.
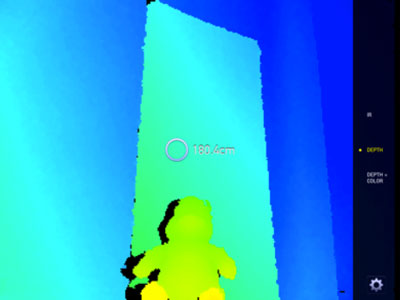
The circular target has been moved from the bear (96.6cm away) to the banner (180.4cm away).
Now that you've seen the depth stream, you can see it registered with the color images coming from your iPad's megapixel camera. Tap the "Depth + Color" link in the right hand menu to see this. Note: The alignment between the depth and color images will be imperfect when you first receive your Structure Sensor. An over-the-air update will be sent to your Structure Sensor in the future to correct this.
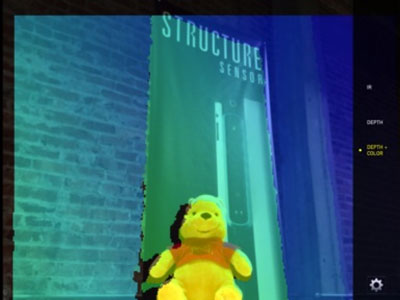
A view of the registered depth and color feeds from the Structure Sensor and the iPad.
The Structure sample app also lets you update your firmware, as well as check the status of your Structure Sensor, including: serial number, firmware version and battery charge. To check the status of your Structure Sensor, tap the "gear" icon in the lower right hand corner of your screen.
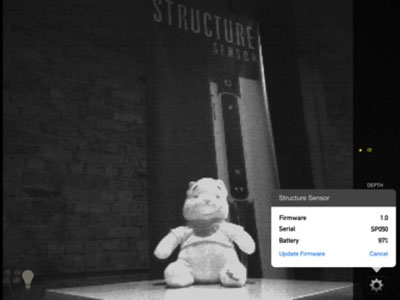
Use the "gear" icon for a quick status check of your Structure Sensor, as well as for firmware updates.
Using Uplink with the Structure App
The Structure app has an advanced feature called Uplink. Uplink lets you connect your Structure Sensor on an iPad wirelessly and in real-time to a Mac or Windows PC on the same wireless network. This allows you to stream data from the Structure Sensor to a PC running a desktop application, therefore taking advantage of the mobility of your iPad/Structure Sensor along with the greater computing power and memory of the PC.
The Uplink menu option will only appear when a computer running an Uplink compatible program is on the same WiFi network as your Structure Sensor/iPad combination.
When a PC with an Uplink-compatible program is on the same network as your iPad, you will see the Uplink option appear in the Structure app's main navigation menu. Select the Uplink option in the menu to start streaming data from your Structure Sensor to the program running on the PC.
Using Uplink with the Structure App and Skanect
Right now, the first available Uplink-compatible program is Skanect. Skanect allows you to create, refine and share high-quality 3D models of objects and people captured with your Structure Sensor. You can learn more about Skanect on the Skanect website. If you backed us on Kickstarter and got a Structure Sensor, you should have received an email from us with your free Skanect Pro license because we hit our stretch goal!
While we won't go into detail on how to get the best quality model using Skanect (we recommend visiting Skanect's support page to watch their video tutorials for that), we will show you the basics of using Skanect in conjunction with the Structure app.
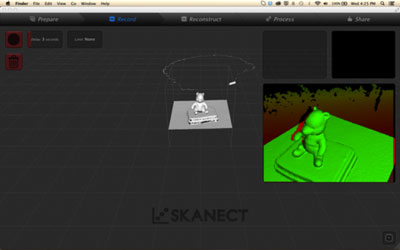
To begin, you need to ensure that your iPad/Structure Sensor is on the same wireless network as the Mac or PC that is running Skanect. If they are not on the same network, then Uplink will not be enabled, and the two devices will be unable to communicate with each other. Next, open Skanect on your Mac or PC, and then click the "Record" tab.
The "Record" tab is the second from the left. The tab will be highlighted in blue when selected, as shown at left.
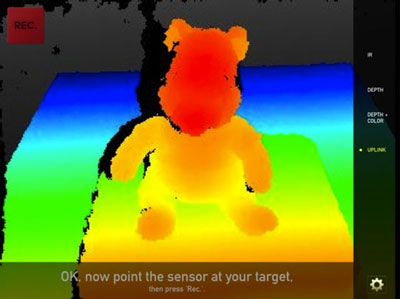
Now, you can select the "Uplink" menu option within the Structure app on your iPad. You'll see that what is on your iPad's screen is now mirrored in the Skanect interface:

The image on the iPad screen to the left is mirrored in real time on the Skanect interface above.
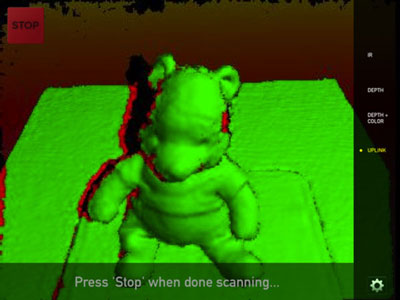
Next, press the "Rec." button in the upper left hand part of your iPad's touchscreen to begin capturing an object or person in 3D. When your scan is complete, press the "Stop" button.
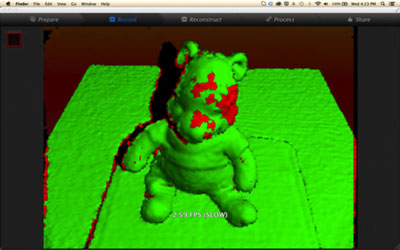
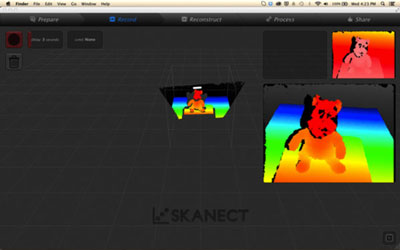
Just as before, what you see on your iPad's screen will be mirrored in real time on your Mac or PC's screen.
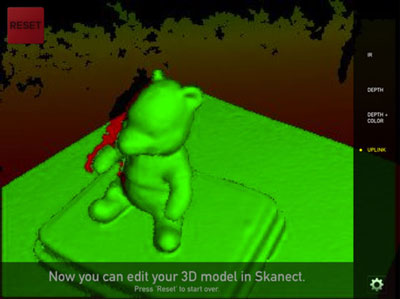
When your scan is complete and you have pressed stop, you will then be able to manipulate and process your completed scan using Skanect. Again, we recommend viewing the video tutorials at Skanect's support page to learn how to use Skanect's processing features in detail.
Sample Applications from the SDK
If you are an iOS developer, these applications can be downloaded from the Structure Sensor, Structure Core & Structure SDK Forums. If you do not have access to the forums, email us at to request access.
Not an iOS developer but want to try the sample SDK apps on your iPad? The Fetch, Scanner and Viewer sample apps are all available for direct download to your iPad from the App Store. Links to each sample app are included in their respective sections.
Using the Fetch Sample App
Hey Developers! The Fetch sample app is included in the SDK download at the following location:
/Structure SDK/Samples/UnityAR_Games/StructureAR.unitypackage
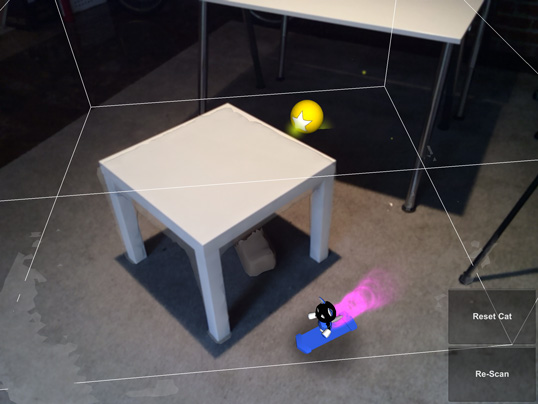
Ready to use your Structure Sensor for augmented reality gaming? We've included a simple but fun sample app called Fetch (available on the App Store) to let you do exactly that! With Fetch, you control a cool cat on a hover board as he flies around your house, fetching power-up balls.
Finding a Suitable Scene
Fetch is more fun when you set up a scene with obstacles that your character can go on top of and behind. You might try putting down a few boxes, or a short table, or another obstacle that will become part of the game world
Fetch will let you use a space that's about two meters by two meters for gameplay. Make sure that you have room to walk around this space so you can scan in all sides of the obstacles within it.
Creating Your Game World
As soon as you've set up your scene and opened Fetch, use the pinch and zoom control on your iPad's touchscreen to adjust the area that the Structure Sensor will scan in for gameplay.
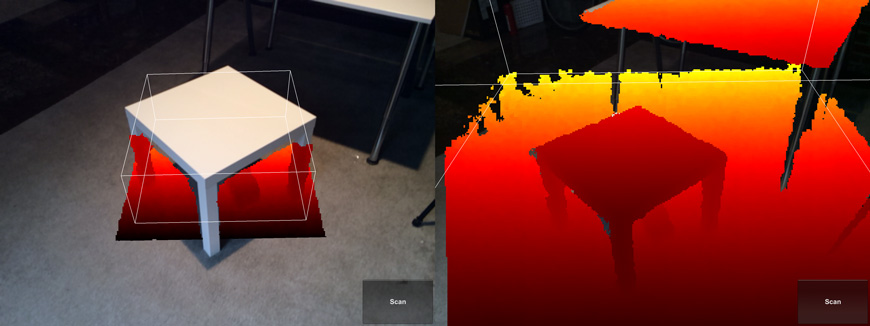
Left: The scan area is too small. Right: The scan area is too big.
This scan area is just the right size.
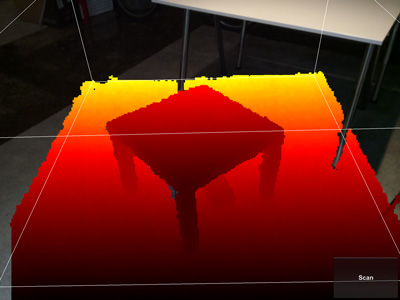
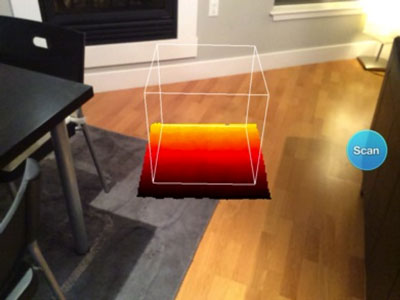
As soon as you've chosen your game area, hit the "Scan" button in the lower right. You will see the Structure Sensor capturing the obstacles in the area. Walk around the obstacles to scan in all of their sides.
An in-progress scan of a small table that we're using as part of our game world.
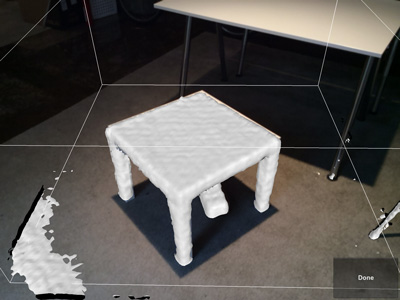
If the Structure Sensor loses tracking while you scan in other sides of your obstacles, then try simply scanning obstacles from a single perspective.
As soon as you are done, hit the "Done" button. Now you're ready to play!
Fetch Game Controls & Gameplay
Playing Fetch is easy. Tap and hold your finger anywhere on your iPad's touchscreen, and the hover boarding cat will go to where your finger is. If you release your finger, the cat will slow down and stop.
To make the cat jump, use a double tap with two fingers. This will help you get your hover boarding cat on top of obstacles in the environment that you can't get around.
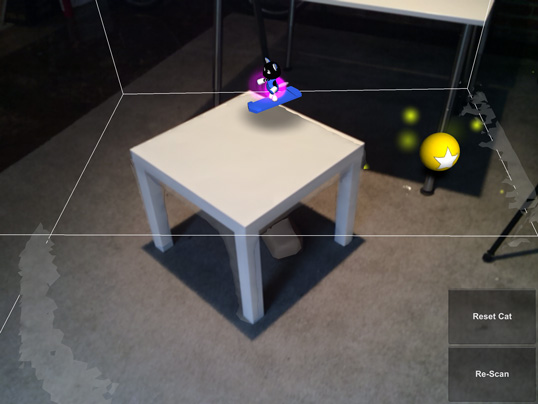
The HoverCat can jump on top of real-world objects.
Hover over to one of the glowing balls for a power up that will let your hover boarding cat jump even higher.
While you play, notice how the hover boarding cat can interact with the obstacles you scanned in. He can hide behind them, jump on top of them, or go up them if they slope upwards. And, of course, he can't go through them.
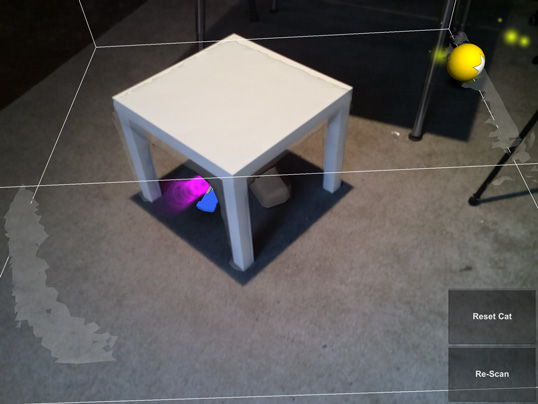
The HoverCat can also go underneath and bump up against real-world objects.
Using The Viewer Sample App
The first sample app to try when you first attach your Structure Sensor to your iPad is the Viewer sample app. Viewer is available in the App Store.
Hey Developers! The Viewer sample app is included in the SDK download at the following location:
/Structure SDK/Samples/Viewer.xcodeproj
Viewer provides a simple view of what the Structure Sensor sees alongside what your iPad's color camera sees. Here is what Viewer's output looks like:
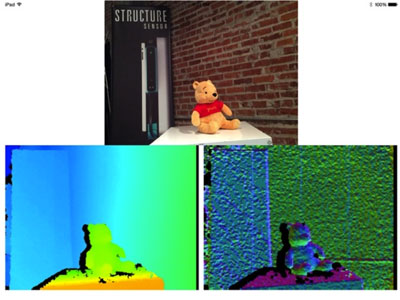
The Structure Sensor's depth feed is on the bottom left. A view of surface normals is on the right. The iPad's color camera output is on top.
Using the Scanner Sample App
In addition to using Uplink with Skanect, the Structure Sensor arrives with another option for those interested in 3D scanning. This is a simple 3D scanning app called Scanner, and is available as a sample app on the App Store. It's easy to start getting great looking scans quickly and consistently if you learn just a few simple things about using this app.
Hey Developers! The Scanner sample app is included in the SDK download at the following location:
/Structure SDK/Samples/Scanner.xcodeproj
Finding Suitable Objects
A great first test for the Scanner sample app is to try scanning another person from the shoulders up to the top of the head.
The Scanner sample app works best for scanning objects the size of a medium-sized stuffed animal up to a human bust. Smaller items will lack detail and may challenge object tracking. Larger objects may be difficult to capture in their entirety.
The Scanner sample app may have difficulty capturing black surfaces and shiny surfaces. In addition, the Scanner sample app will have difficulty capturing intricate features, such as hairs, wires or other fine objects.
Setting Up Objects To Scan
For the best quality scan, please follow these general guidelines:
- Stand about 1 meter (or 3 feet) away from the object or the person
- Make sure that you have an unimpeded 360-degree path around the object or person so that you may capture an entire scan easily
- For objects, placing them at a standard tabletop height allows for the best combination of scanning quality and ease
- For objects, placing them on a smooth, flat surface ensures that the Scanner sample app will consistently capture great scans
- The Structure Sensor works best indoors or outside of direct sunlight
Positioning the Scan Area Cube
When you first open the Scanner sample app and connect your Structure Sensor to your iPad, you will see a large transparent cube appear on your screen. The bottom of this cube has an orange square. The orange square will automatically snap itself to flat surfaces such as floors or walls so that your scan is positioned on a flat plane.
Alternatively, if you point the Structure Sensor towards a person, the transparent cube will position itself around their upper torso and head for a bust scan.
The transparent cube and orange square determine what objects or people the Scanner sample app will capture.
To scan an object, start by standing about a meter (about 3') away from the object. Then, center the object within the transparent cube. Once the object is within the cube, you will see that the orange square will now adjust itself to fit over the object you plan to scan.
When placed on an object or person, the transparent cube and orange square show what will be captured once the blue "Scan" button is pressed.
If parts of the object you plan to scan are not covered in orange, you are standing too close. Back up until those parts are covered.
In this picture, the Structure Sensor is too close to the subject to be scanned, as it does not fit entirely in the transparent cube.
Using the "Pinch" Gesture
Because the cube determines what will be captured by the Scanner demo, it is important to make sure the cube is the right size for the object to be scanned.
The size of the transparent cube can be easily adjusted using the typical iPad "pinch" gesture. Push your thumbs together on your iPad screen to make the cube smaller, and pull them apart to make it bigger.
If the cube is too small to contain the object you plan to scan, you can expand the cube by pulling your thumbs apart on your iPad screen. You may also try to move backwards so that you are further from the object you plan to scan.
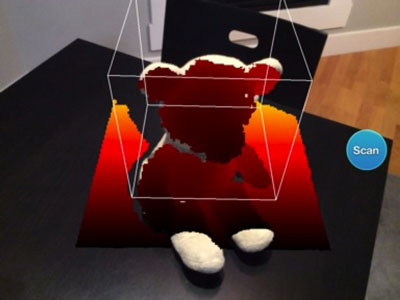
Although the Structure Sensor is a reasonable distance away from the object to be scanned, the scan area cube is too small.
Put both thumbs on the touch screen and move them apart to make the scan area cube larger.
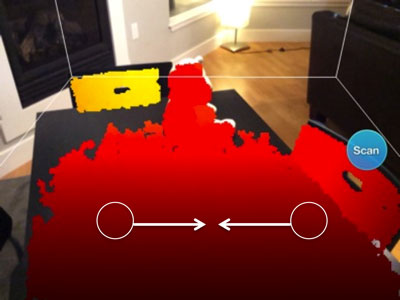
If the cube is too large for the object you plan to scan, then your scan will be of poor quality and you may potentially capture objects in your scan that you do not want. You can shrink the cube by pushing your thumbs together on your iPad screen. You may also try to move closer so that you are nearer to the object you plan to scan.
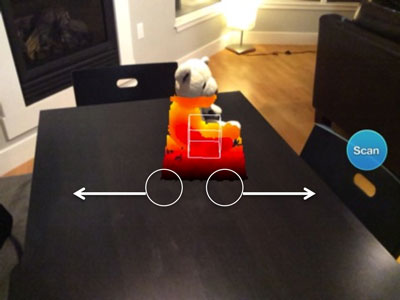
Although the Structure Sensor is a reasonable distance away from the object to be scanned, the scan area cube is too large.
Put both thumbs on the touch screen and move them together to make the scan area cube smaller.
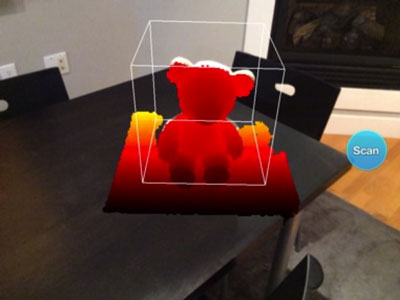
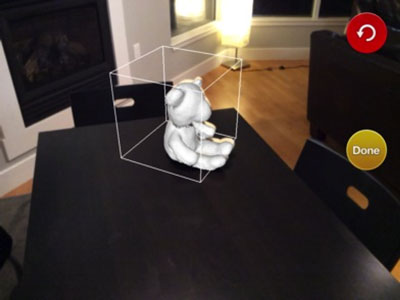
For the highest quality scans, pinch to shrink the cube so it is just a bit bigger than the object within it that you plan to scan.

The size of the scan area cube is just about right to begin scanning this teddy bear.
Scanning the Object
To begin your scan, press the blue "Scan" button.
Once you have started, move around the object to capture it. If you notice that there is a hole in the model, you can go back during the same scan to see if the Scanner sample app can fill it in.
If you have made a mistake during your scan, you can press the red reset button with the circular arrow on it to restart your scan.
Click the "Done" button when your scan is complete.
As soon as you start scanning, you will see your 3D model appearing on top of your subject in real time.
As you continue your scan, you can go back and fill in holes and other problem areas to improve your 3D model.
Maintaining Tracking
On your first few scans, you may notice that the Scanner sample app loses track of the object. A warning note will appear on your screen:
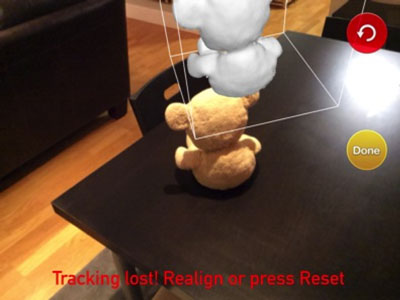
On rare occasions, the Scanner sample app will lose tracking of the object or person you are scanning. You will see this error message if that happens.
Try to rematch the scan to the object you are scanning to restart object tracking. If that doesn't work, try your scan again. If you consistently get object tracking errors during a scan of the same object, that object may not be suitable for scanning.
Viewing Your Completed Scan
To view your scan, click the "done" button. A review screen will appear. You can use your finger to drag the model around to see all sides of it.
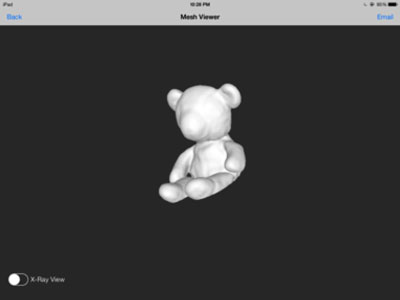
Once you click the "Done" button, you will automatically be taken to this screen.
Use your finger to drag the model around to see it from all angles.
You can also click "X-Ray View" to see the underlying mesh of the model that you have captured.
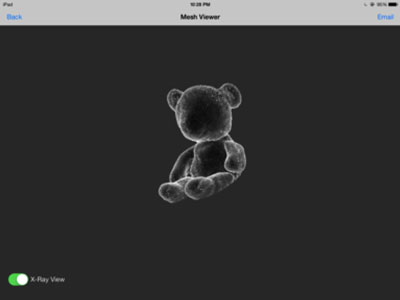
When you click the "X- Ray View" button, the underlying mesh will appear.
Click the "Email" link in the upper right hand corner to export an .OBJ file.
To share or export a scan, click the "email" link in the upper right hand corner. Click this to email an .OBJ file of your scan to yourself or a friend.
Click the "Back" link to reset the app so you can start your next scan.
More apps are coming soon!
At Occipital, we're planning on releasing more sample apps to expand the functionality of your Structure Sensor. In addition, developers worldwide are now using the Structure SDK to create more great apps, too.
We'll be sure to keep you posted whenever new sample apps are available for your Structure Sensor. And, if you're a developer, we're always here to help you build your own great app for the Structure Sensor!
Need more help using your Structure Sensor?
If you have more questions, our Support Center has answers.
We're always ready to help answer any questions or comments you might have about your Structure Sensor. Contact us anytime!
Follow Occipital and the Structure Sensor
On Twitter
@structure and @occipital
On Facebook
structure3d and occipital